
Test an API Key
Overview
You created an API key. With your API key, you can test all of Apollo's API endpoints directly on this site. And if you're not ready to test, you can still review example responses, including the schema, for every endpoint without testing.
For this scenario, we're going to use this developer hub and Postman, but the same information can be applied to your preferred development platform.
Prefer your own tooling?You can also download the full OpenAPI specification and import every endpoint into tools like Postman or an OpenAPI code generator. For step-by-step import and authentication setup, see Import into Postman.
Test Apollo API
To test Apollo API directly in this documentation:
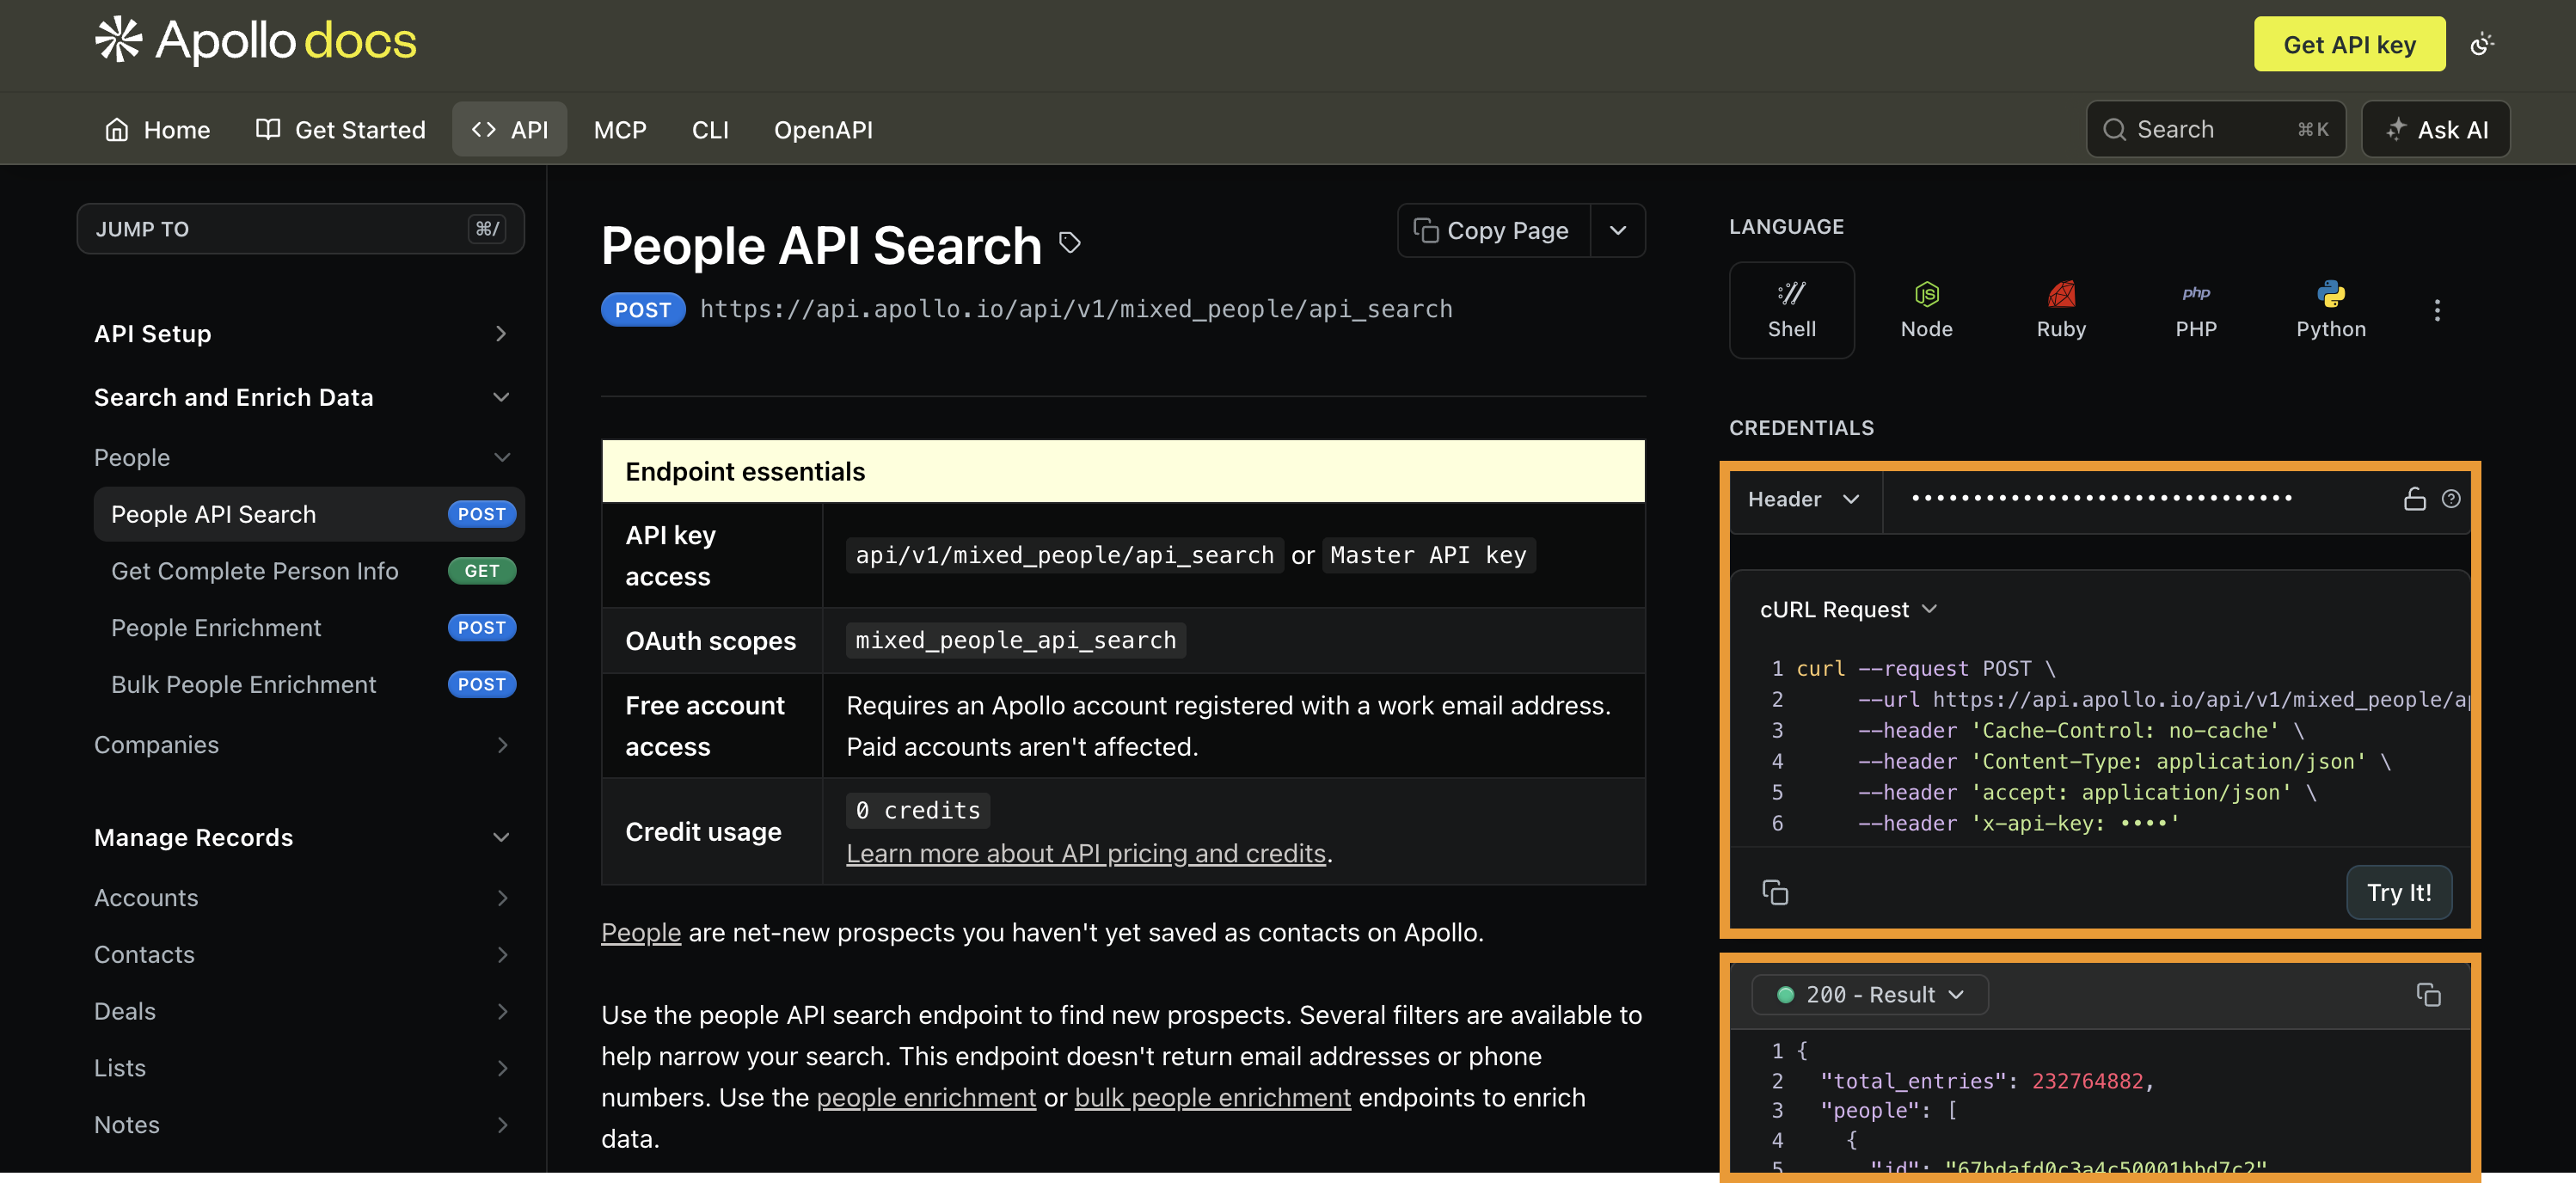
- Go to any endpoint you want to test in the Developer Docs, such as people API search.
- Choose one of the available programming languages.
- Enter your API key in the
x-api-keyheader field. - Enter parameter details to generate your API request. At a minimum, address the required parameters. As you add values to the parameters, the API request updates live.
- Click Try It to send your request.
The response from Apollo API appears directly in the response section. A successful request generates a 200 response.
Test Apollo API with an API Client
While this example uses Postman, you can use any API client to test Apollo API.
To test Apollo API in an API client:
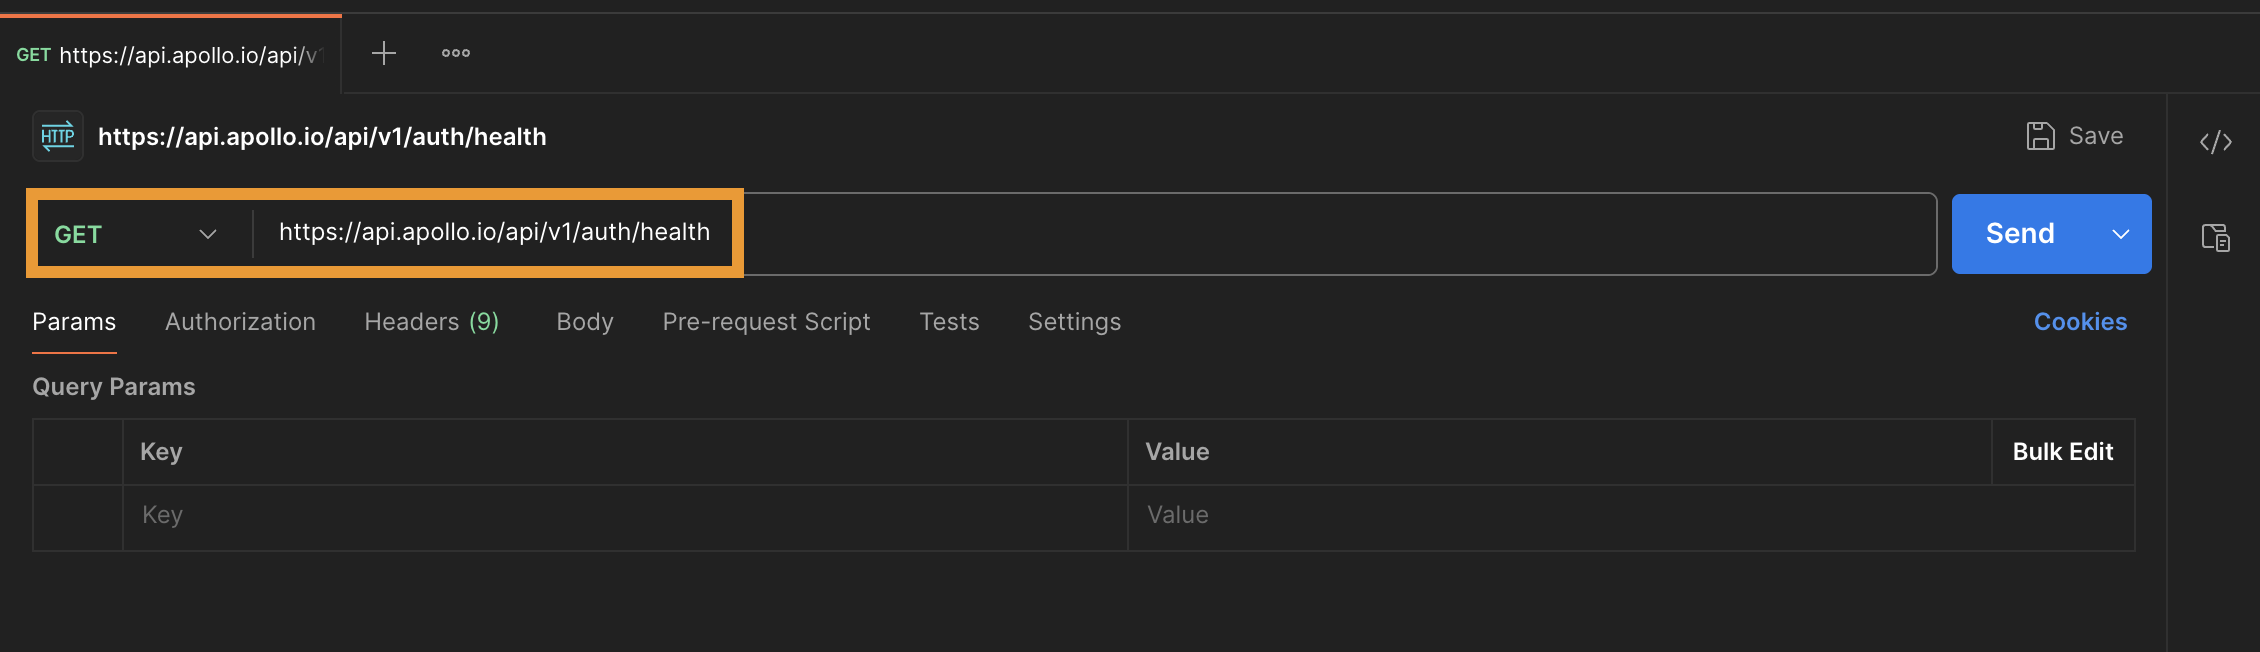
- Create a new request in Postman.
- Select GET and paste
https://api.apollo.io/api/v1/auth/healthfor the URL.
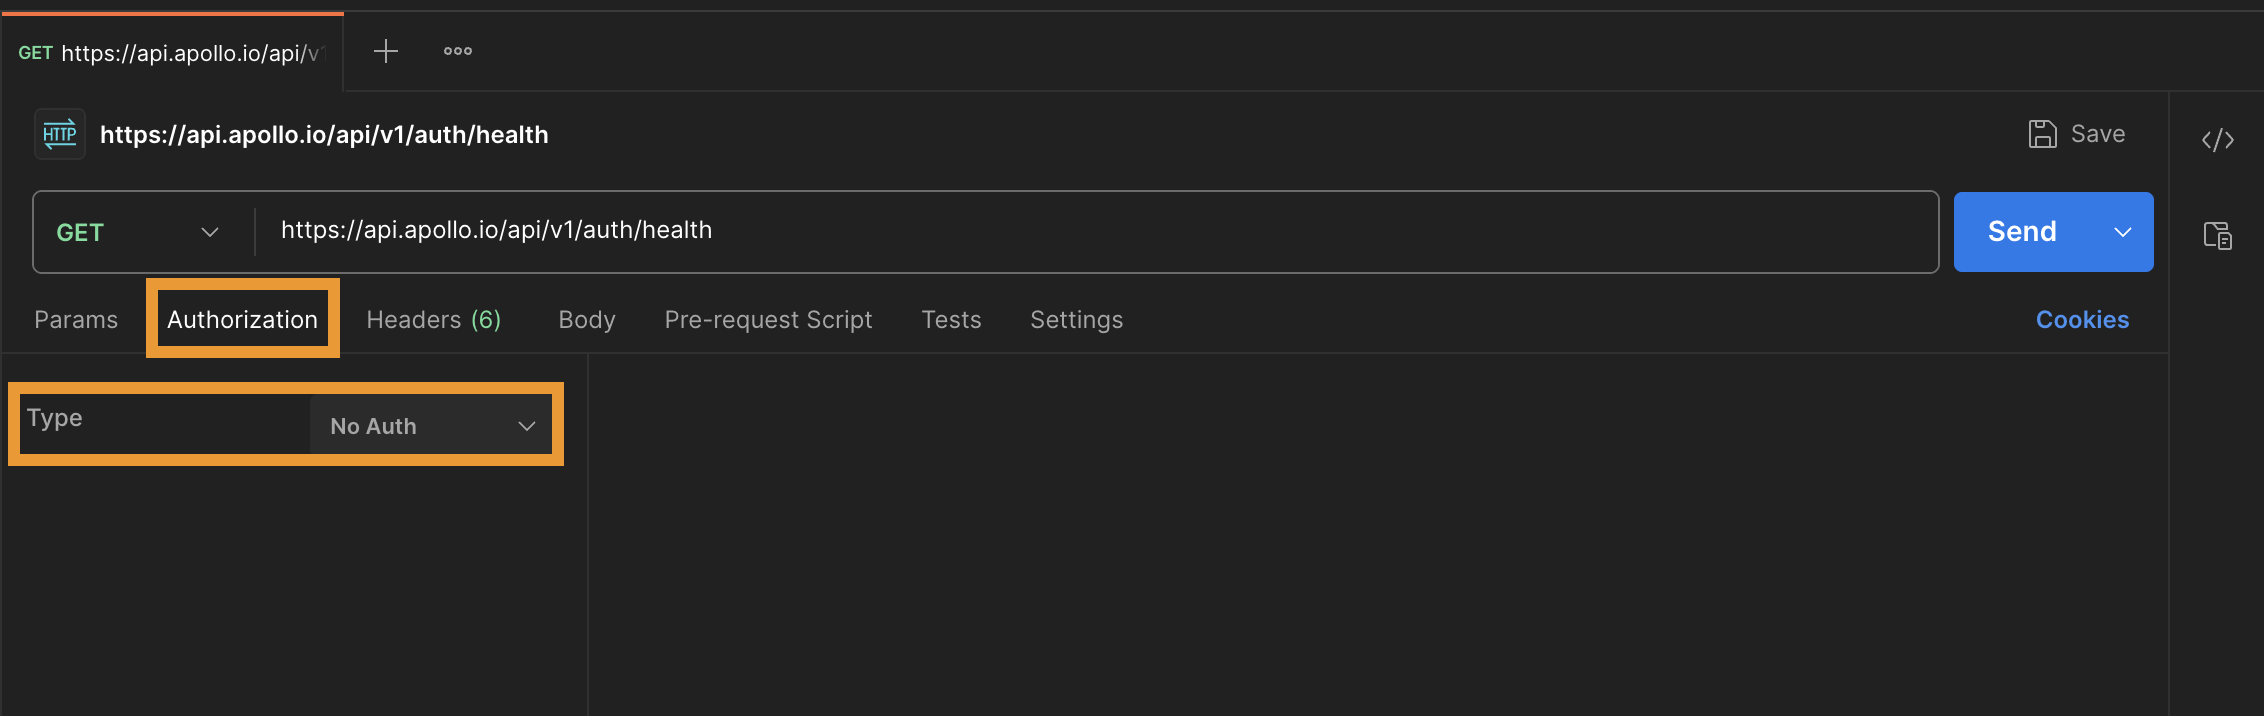
- Click Authorization and select No Auth as the type.
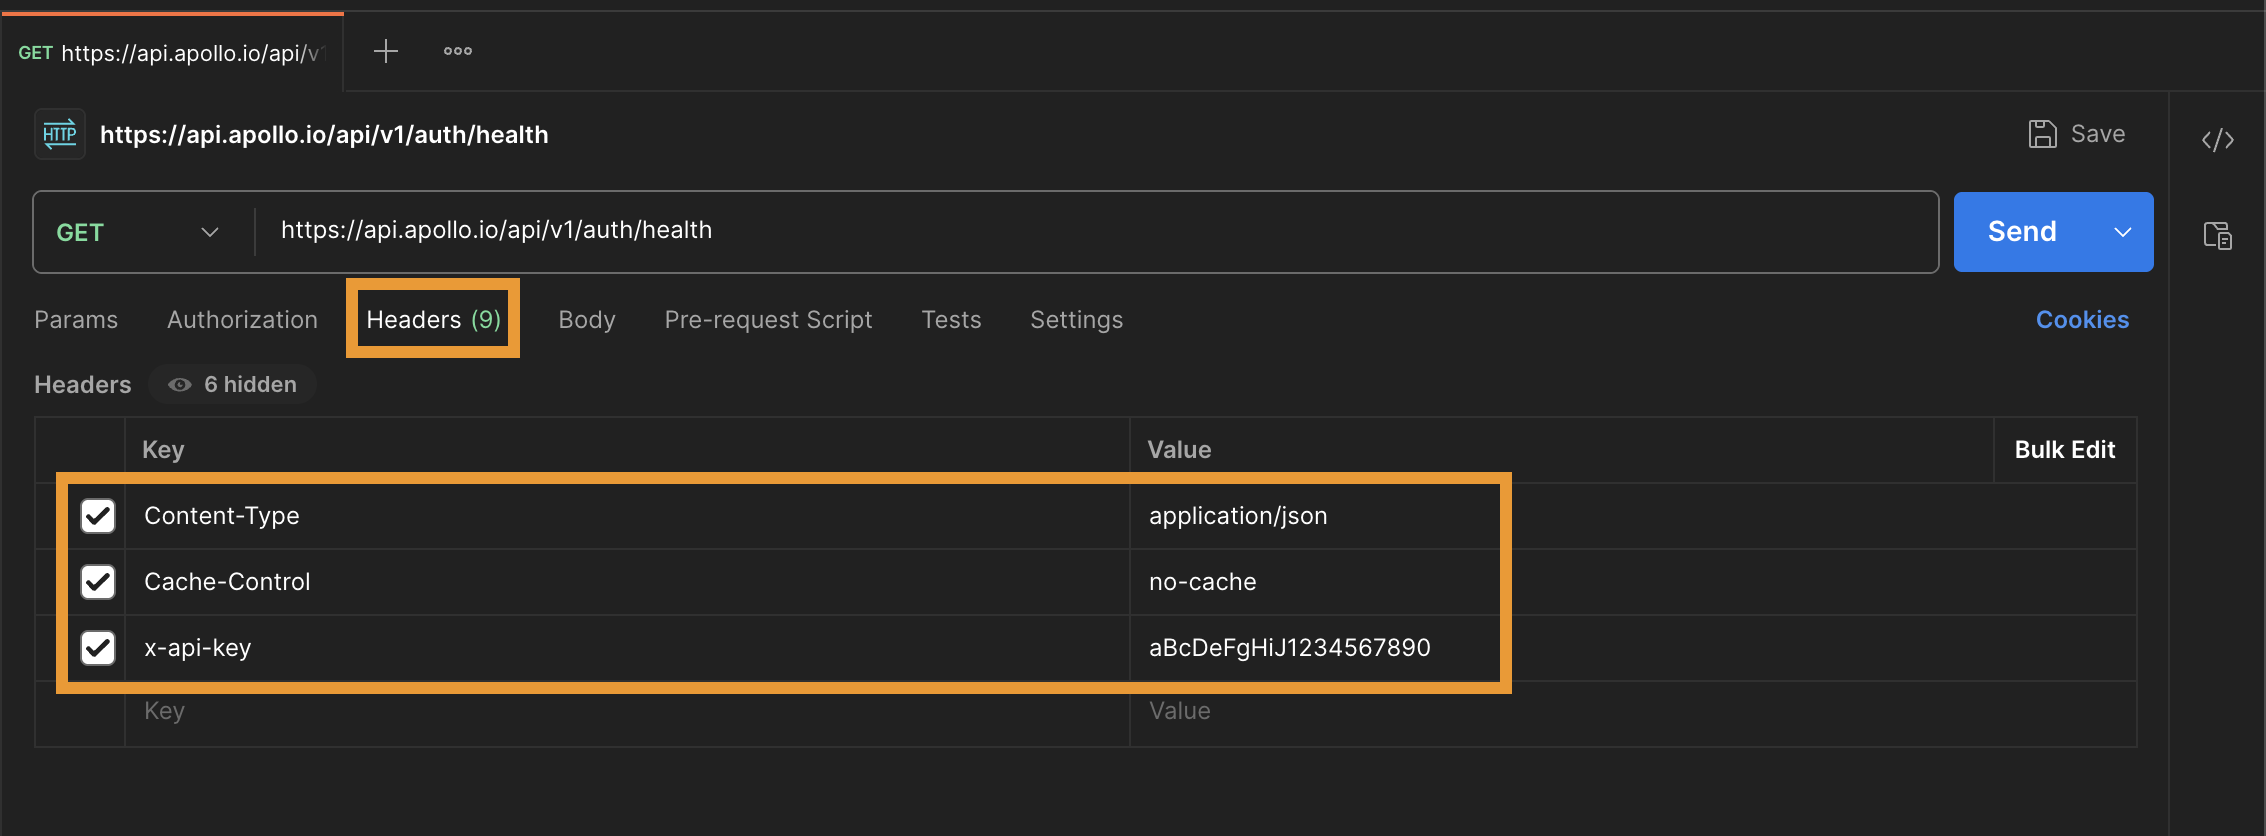
- Click Headers and add the following keys and values:
| Key | Value |
|---|---|
| Content-Type | application/json |
| Cache-Control | no-cache |
| x-api-key | Enter your Apollo API key. |
- Click Send.
If your setup is correct, you receive the following JSON response:
{
  "healthy": true,
  "is_logged_in": true
}
When both values in the response are true, you're ready to use Apollo API.
False ResponseIf either object has a
falsevalue, check your request. Delete any erroneous spaces or returns after your API key. Once you're sure your request is formatted appropriately, click Send to try again.
Use Apollo API
You confirmed your API key is working.
Now try some tutorials to understand Apollo API capabilities.
Updated 1 day ago